How To Make Sweet Potato Fries In The Oven!

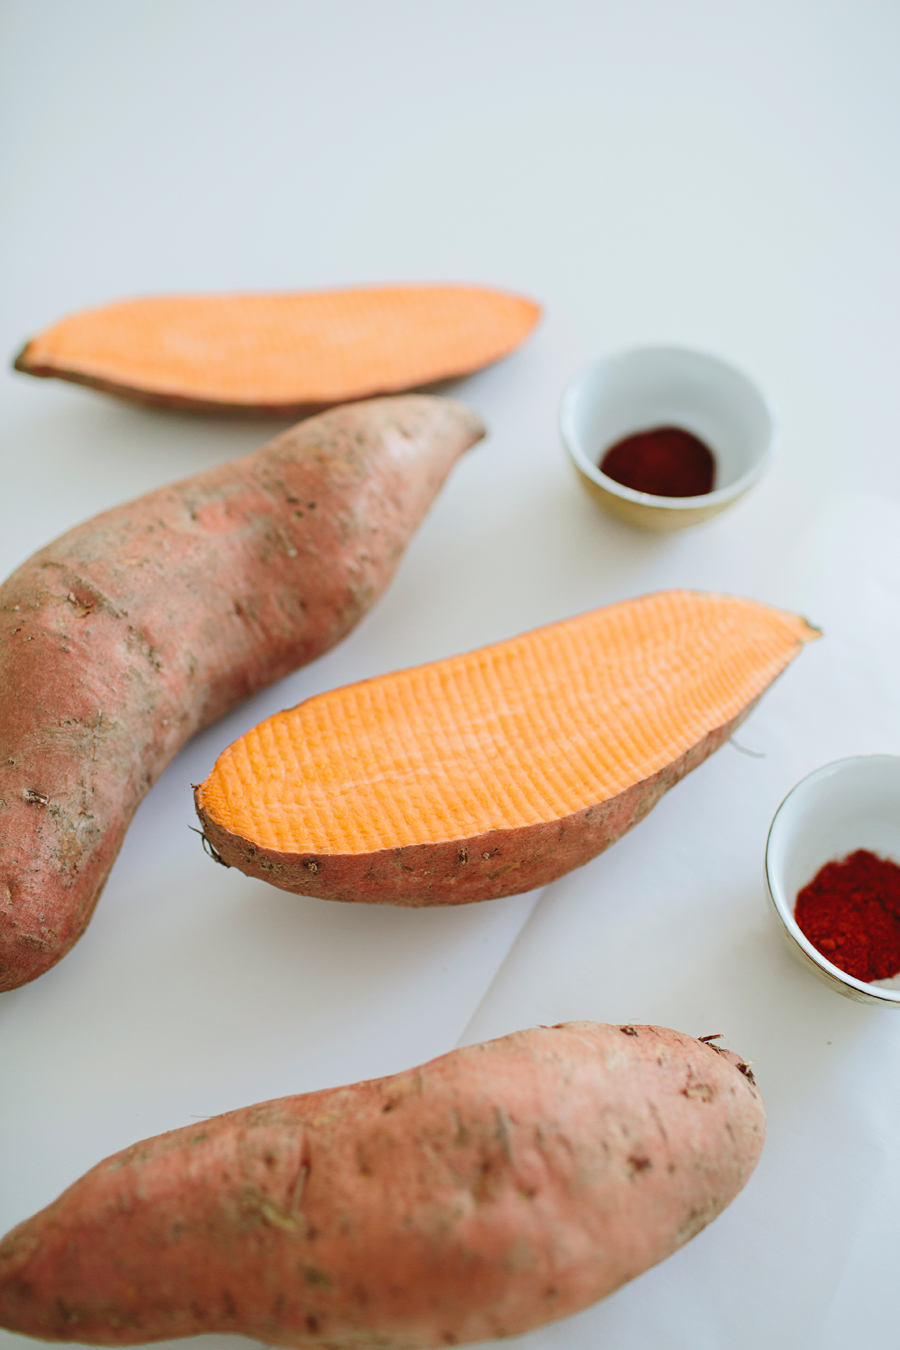
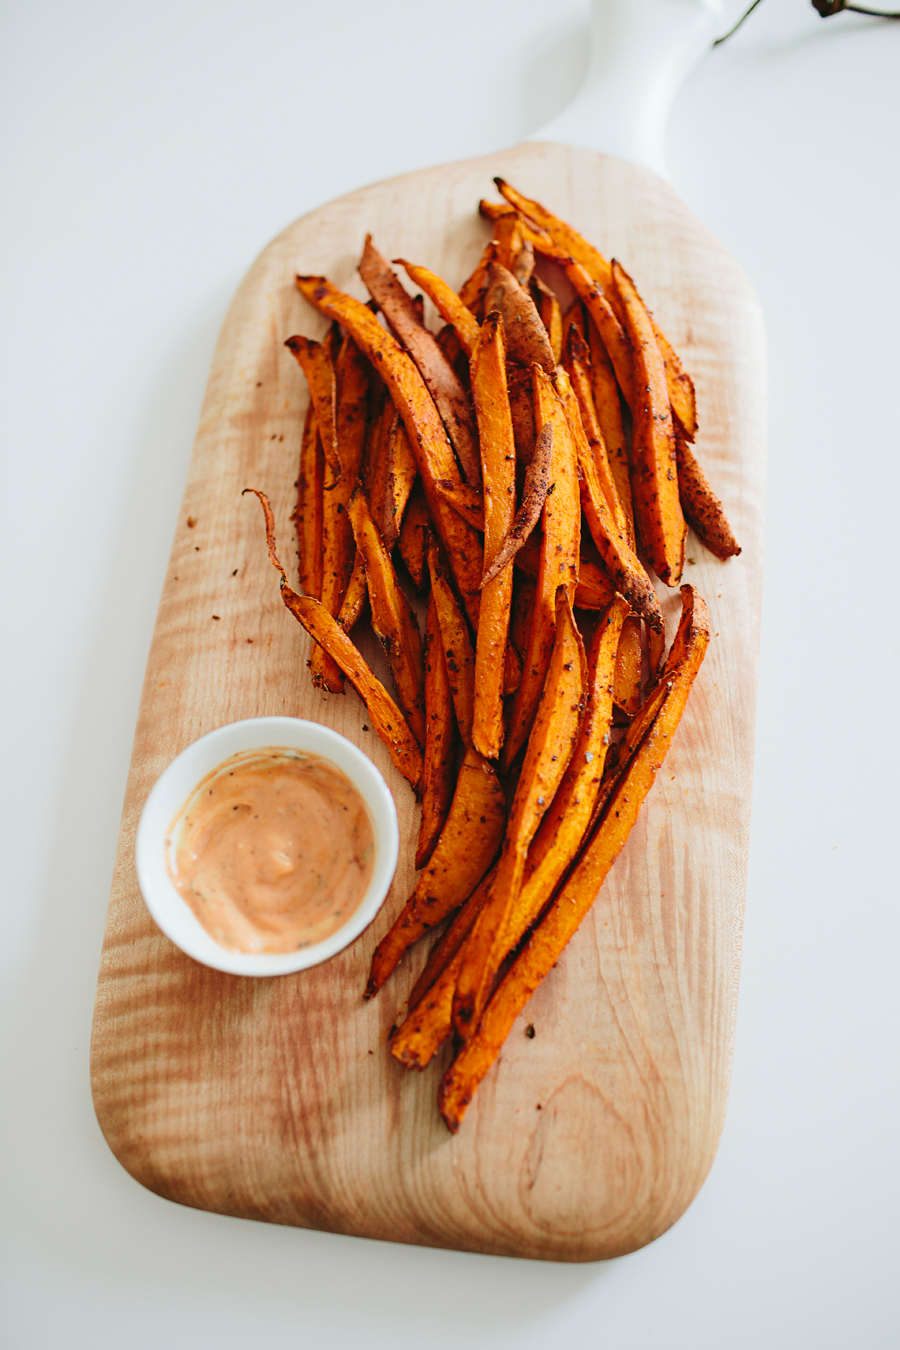
I could eat sweet potato fries several times a week and never complain about it. They're just so dang delicious. And when homemade in the oven (no deep fryer! = less calories!), they're the perfect addition to your meal. Who am I kidding, they're the perfect meal. Our little June (currently 14 months) loves them and slurps them down like they're noodles. 😂 It's so cute.

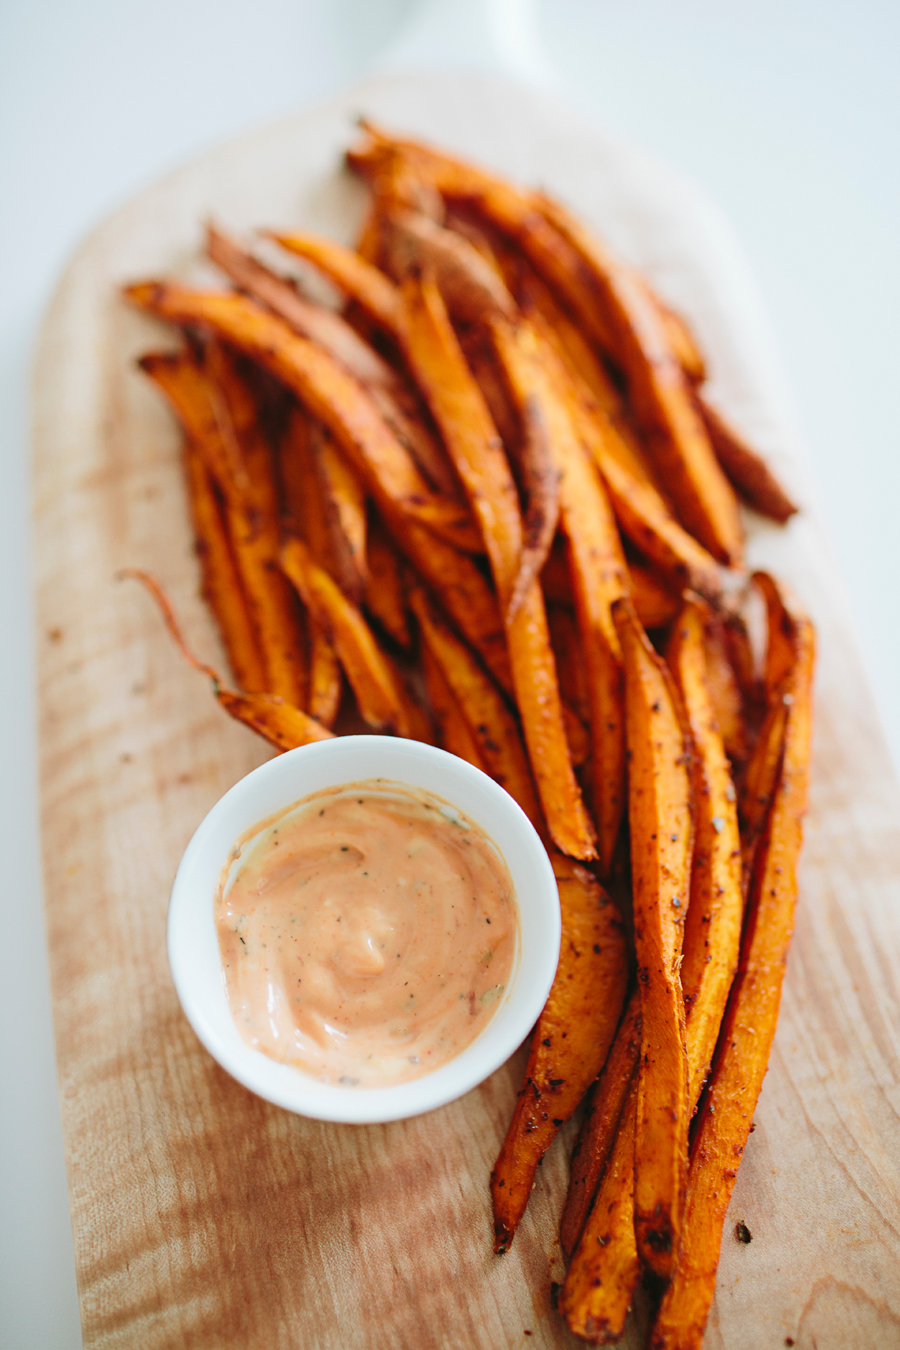
And since these fries are baked in the oven... that means dipping them in Sweet Sriracha Fry Sauce is okay, right? Yea, I thought so too.

Oh, and here is a super official chart to show you how much I eat these fries now.

INCREASE IN FRY CONSUMPTION

HOMEMADE SWEET POTATO FRIES & SWEET SRIRACHA FRY SAUCE

  • 2-3 sweet potatoes (or Yams, like I use all the time!)
  • Olive Oil
  • Salt & Pepper
  • Chili Powder
  • Garlic Powder
  • Paprika
  • Mayo
  • Ketchup
  • Sriracha
  • Dried Oregano
  • Black Pepper
  • Onion Powder
  • Garlic Powder

INSTRUCTIONS:

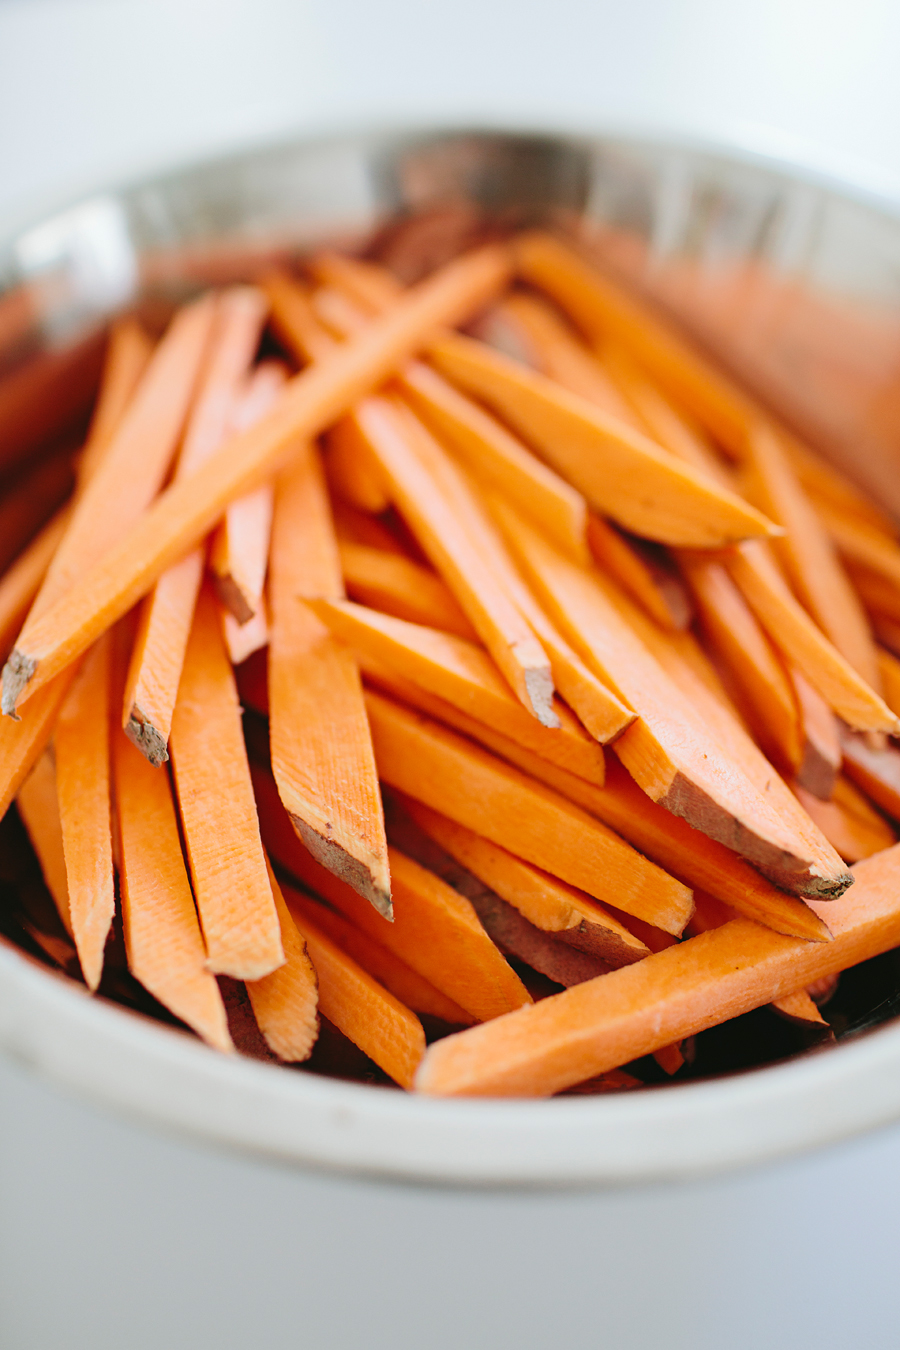
Start by slicing your potatoes or yams into thin fries. Use a sharp, heavy duty knife, as they can often be very hard to slice. Once you've cut up all your fries, place them in a clean bowl.

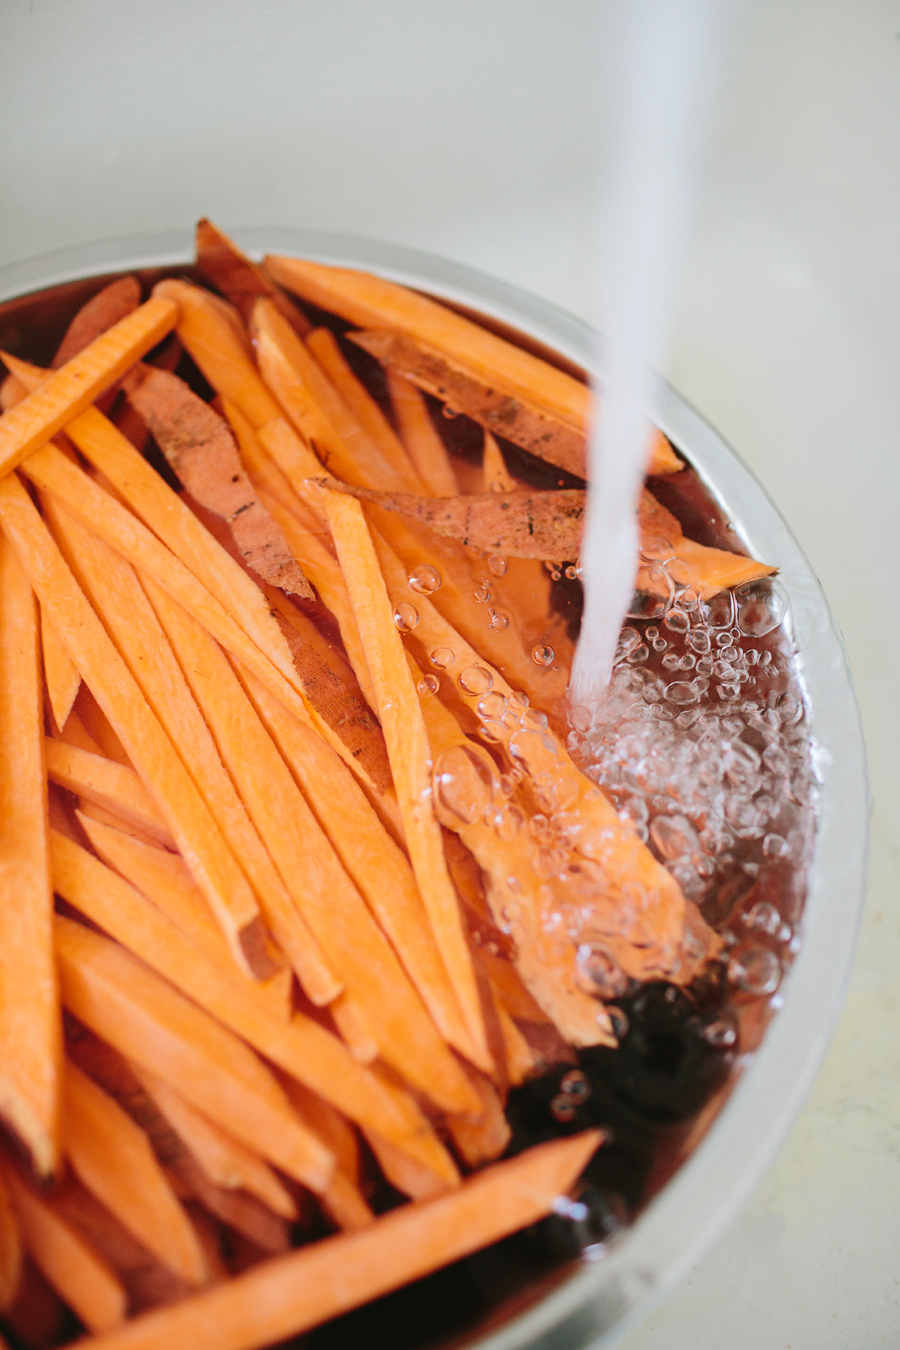
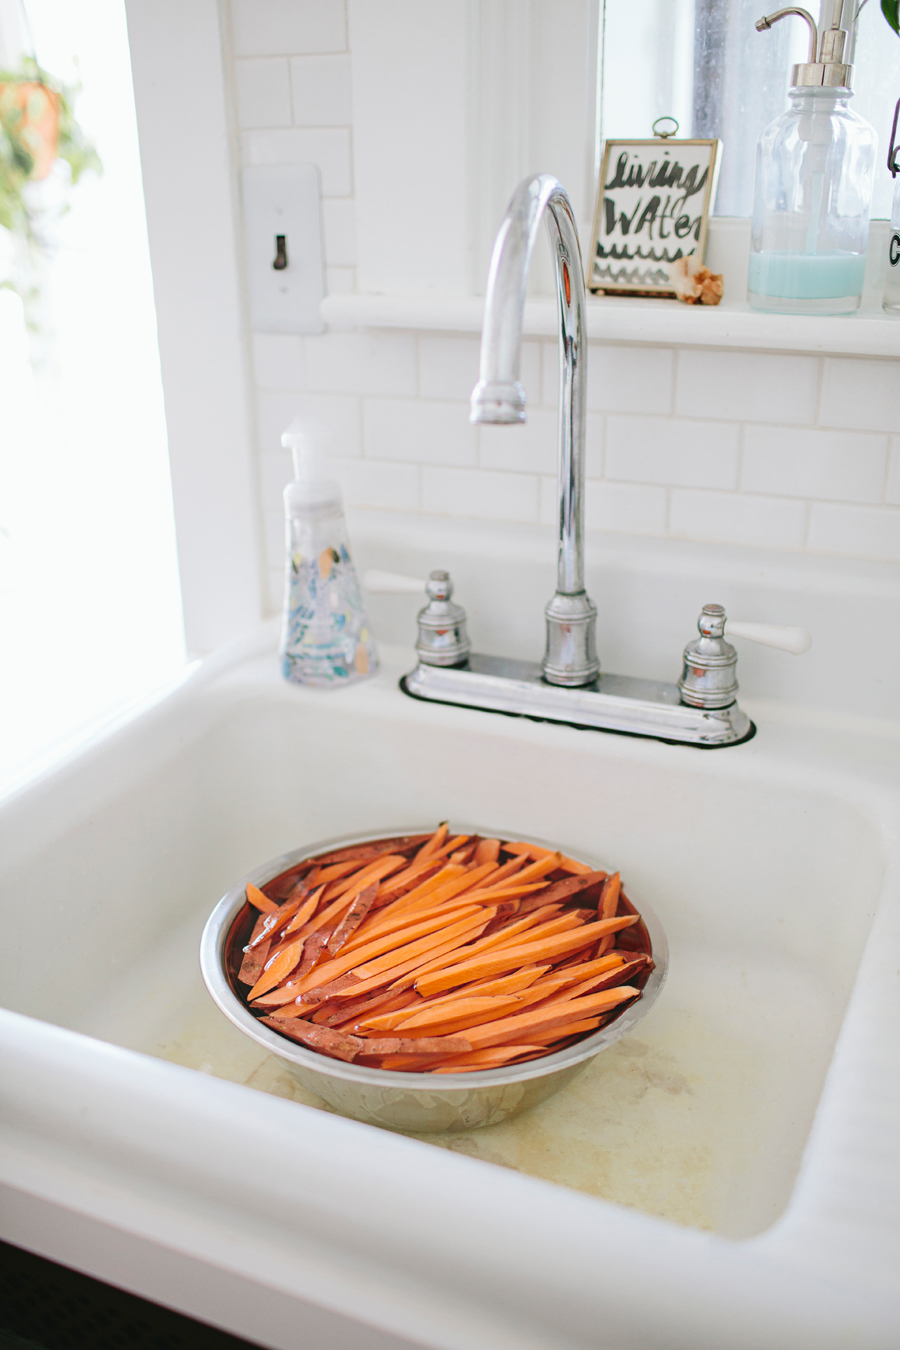
Rinse the sliced fries in cold water to remove any dirt, and then let the fries soak in the cold water for at least 10 minutes, or up to a few hours. Soaking them in cold water will remove some of the starch, allowing for a crispier fry in the end! Change the water occasionally, if you decide to soak them for longer than 10 minutes, to remove the cloudiness of the water and starch at the bottom of the bowl. Once you're finished soaking them, rinse them one last time and do your best to get as much water out of the bowl as you can.

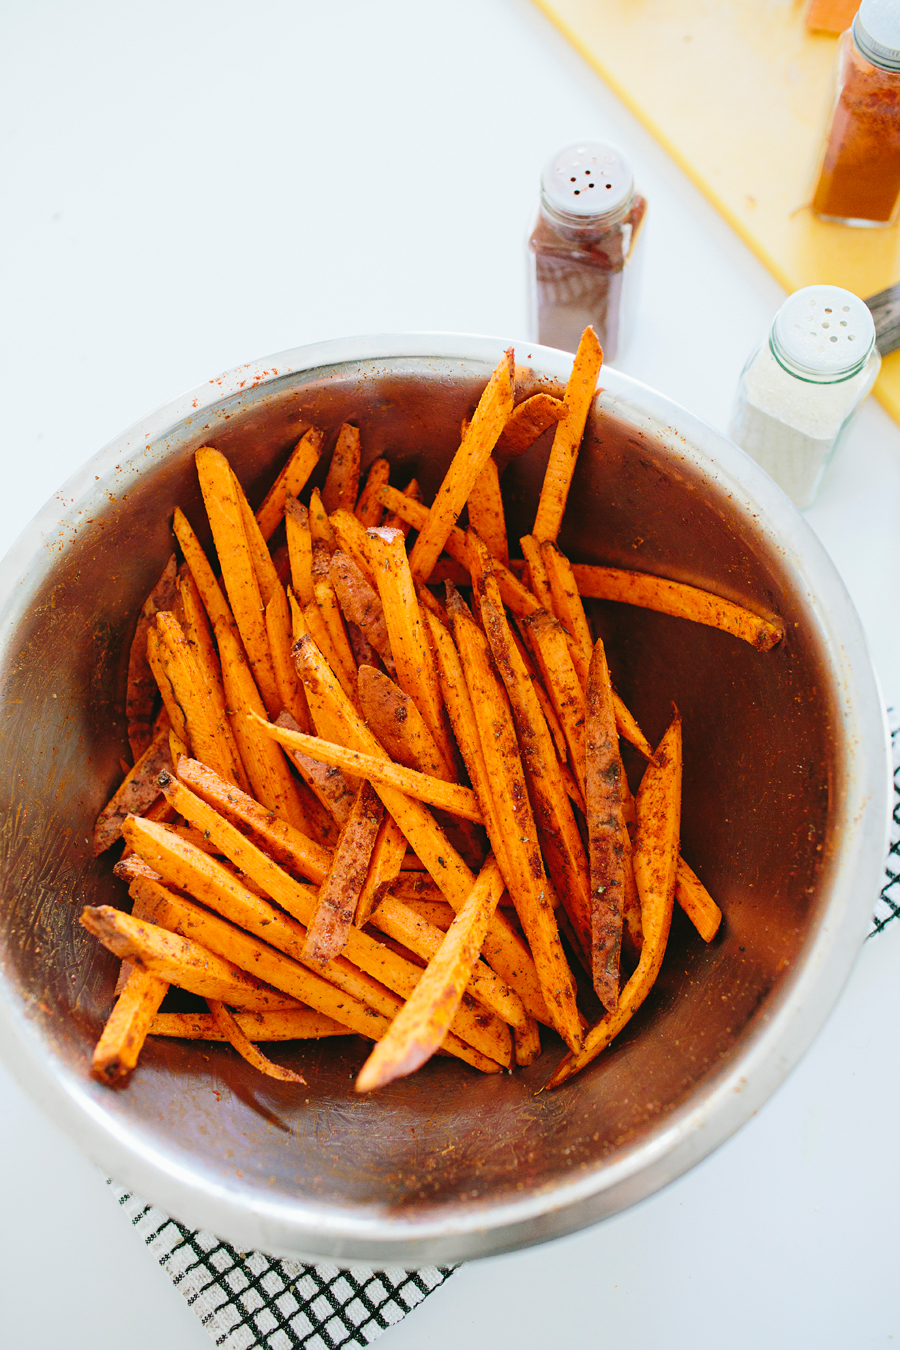
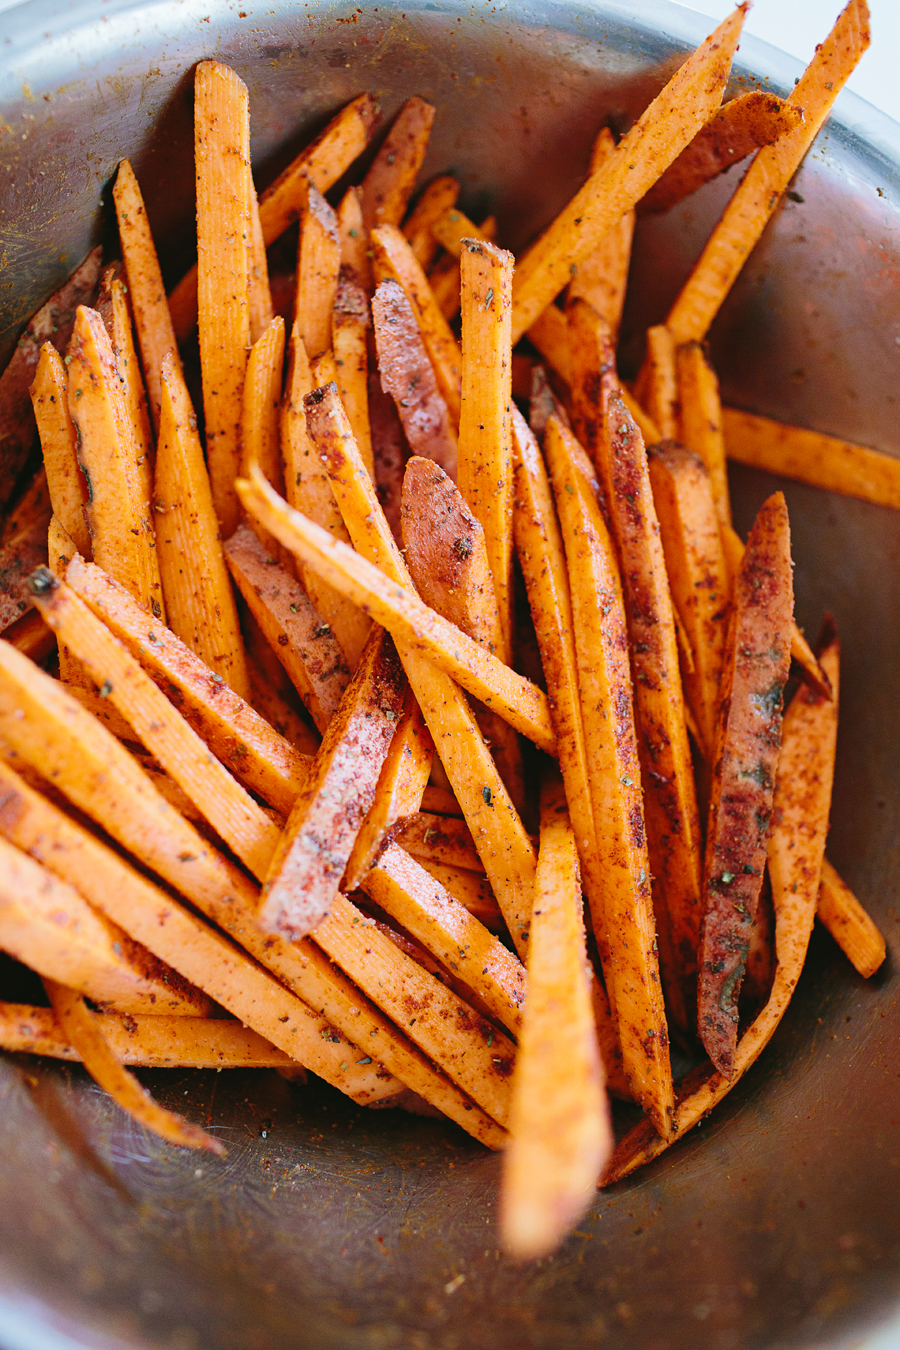
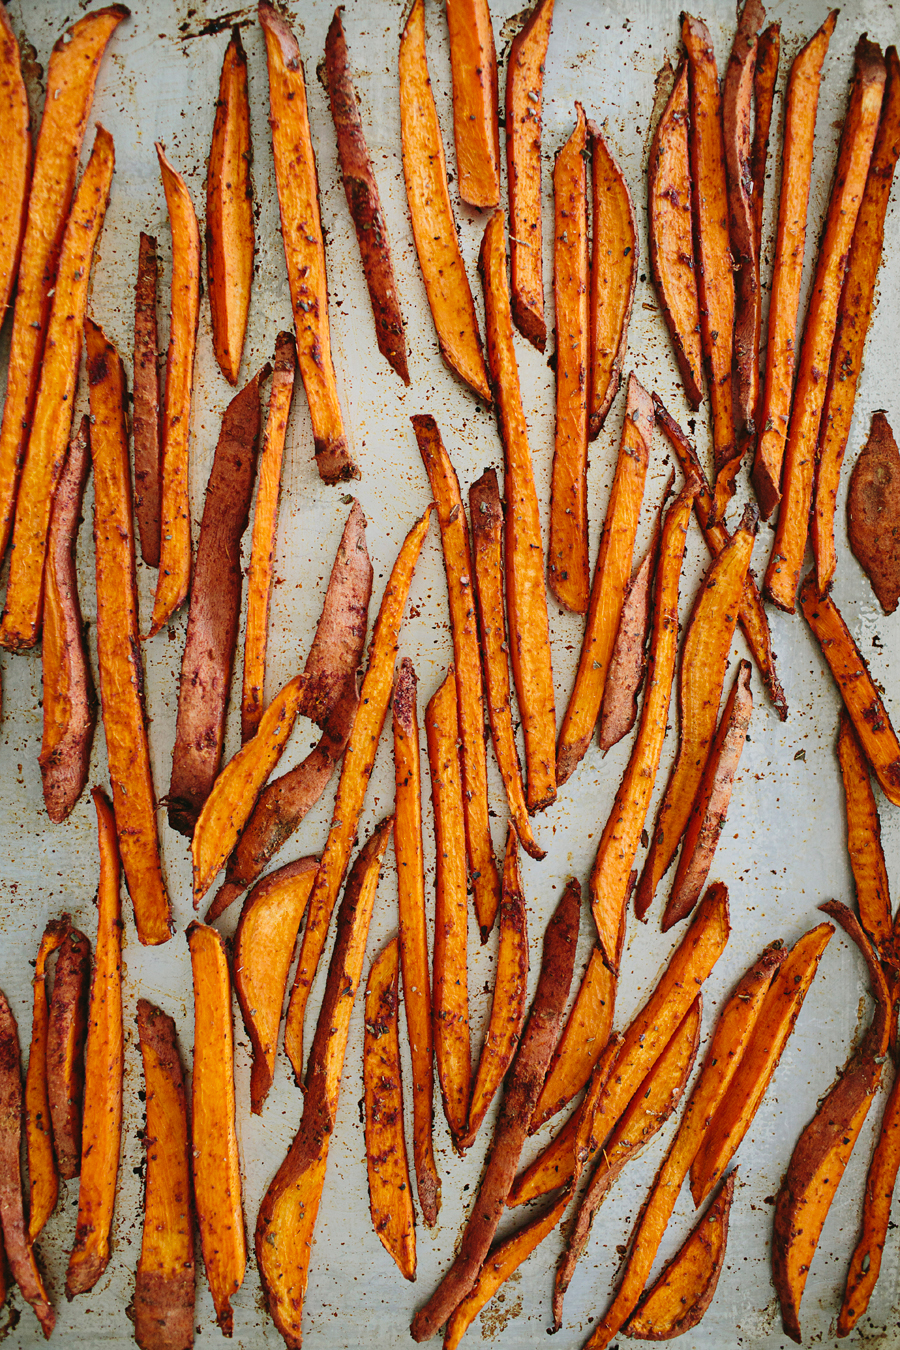
Now to make them extra delicious! Coat fries well in olive oil. Then add spices -- there is no exact measurement for the spices, because it depends how many fries you're making and how strong you'd like the flavor to be! For the three large yams I used here, I would guess I was around 2 teaspoons of the garlic powder, paprika, chili powder and dried oregano. (Feel free to use more or less once you've figured out what you like best!) What I normally do is sprinkle all a little bit of all four of those ingredients on the fries, give them a good shake/mix, and then sprinkle the same stuff on them again - repeating this maybe four times. It seems easy to add the spices to the fries in several rounds, instead of just dumping it all in there and hoping they all get well coated.

Once spices are added, salt and pepper to taste.

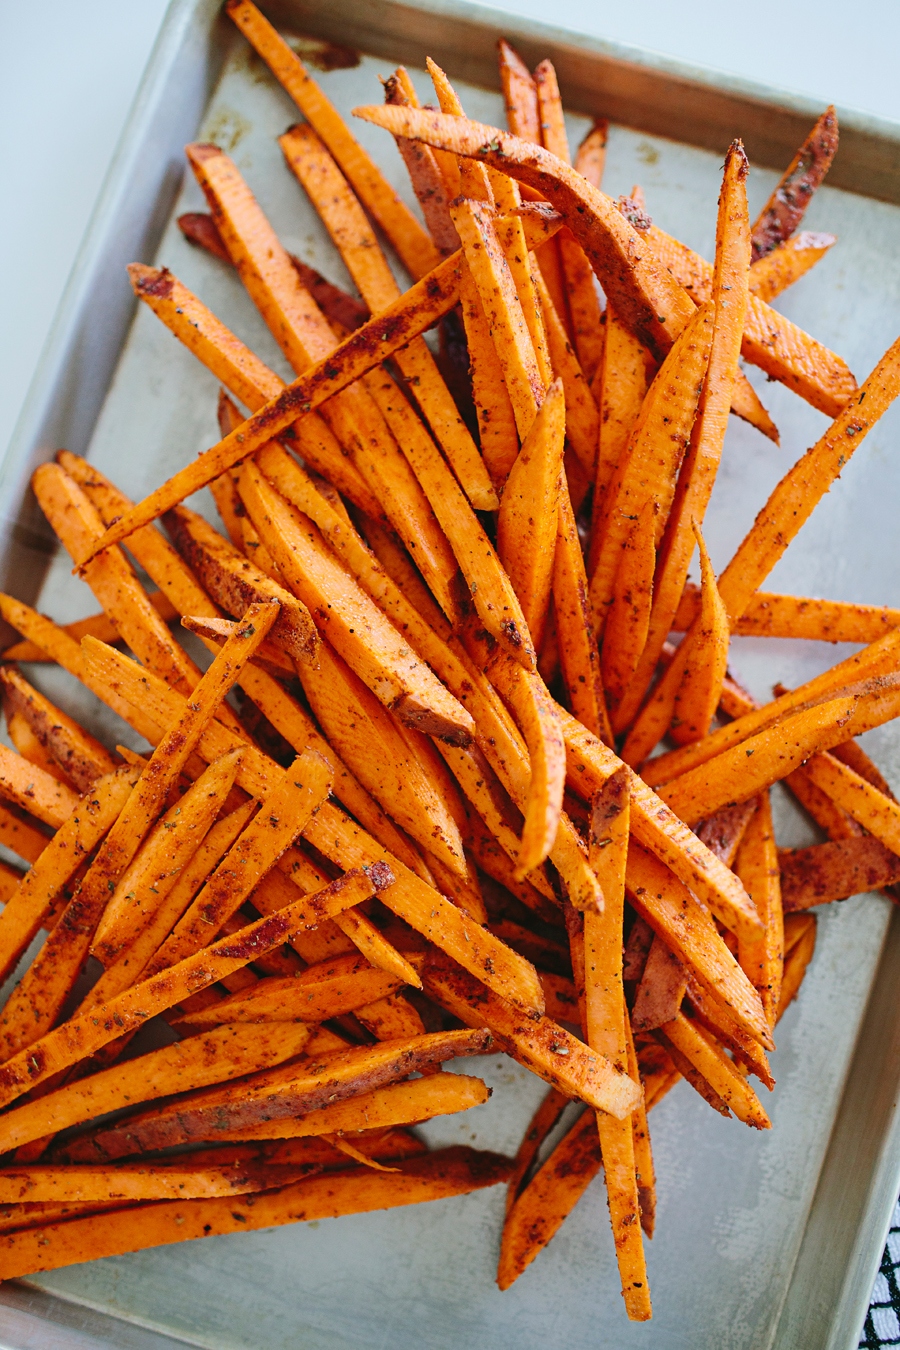
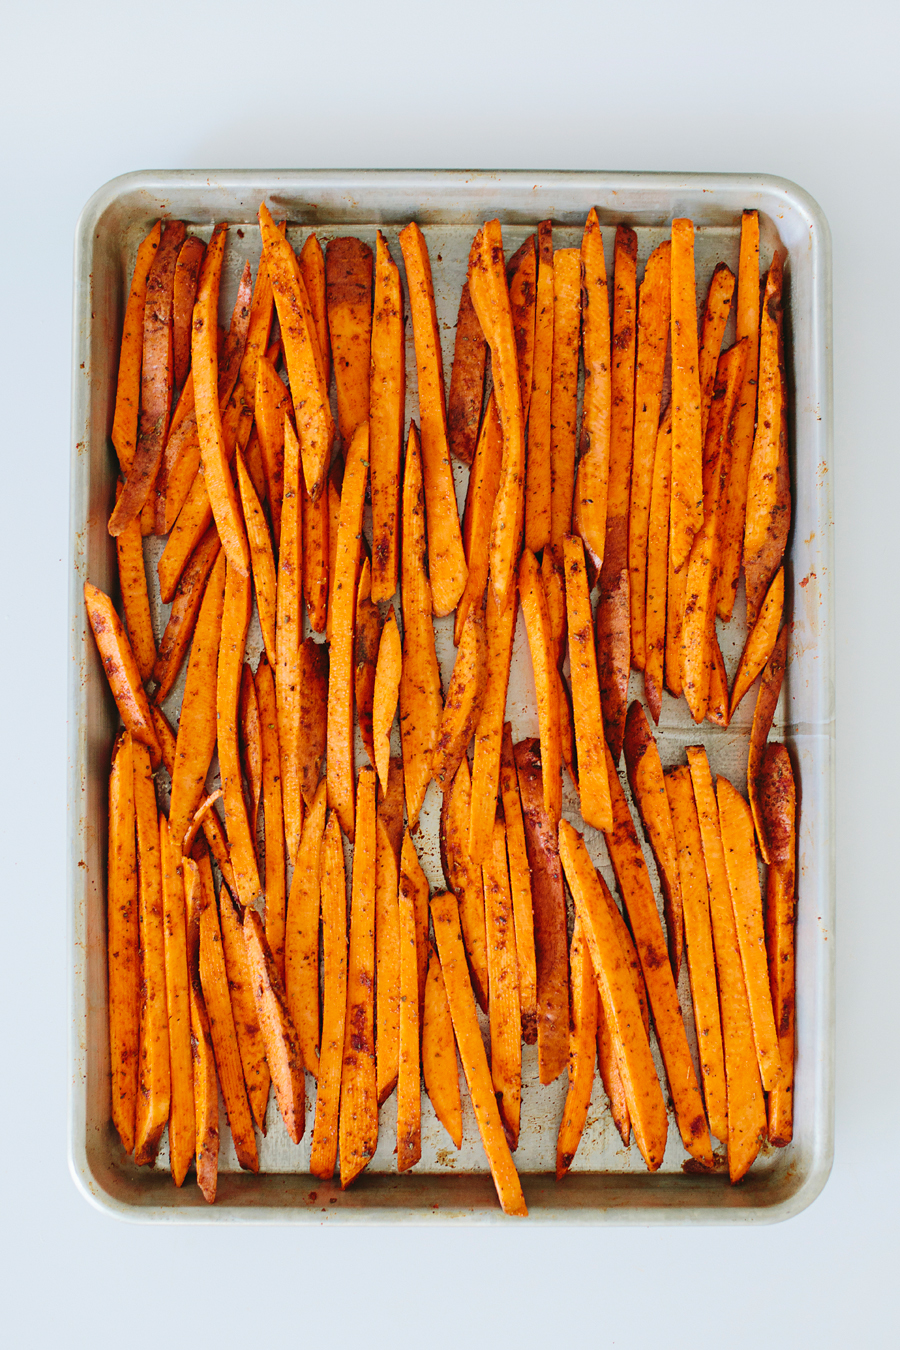
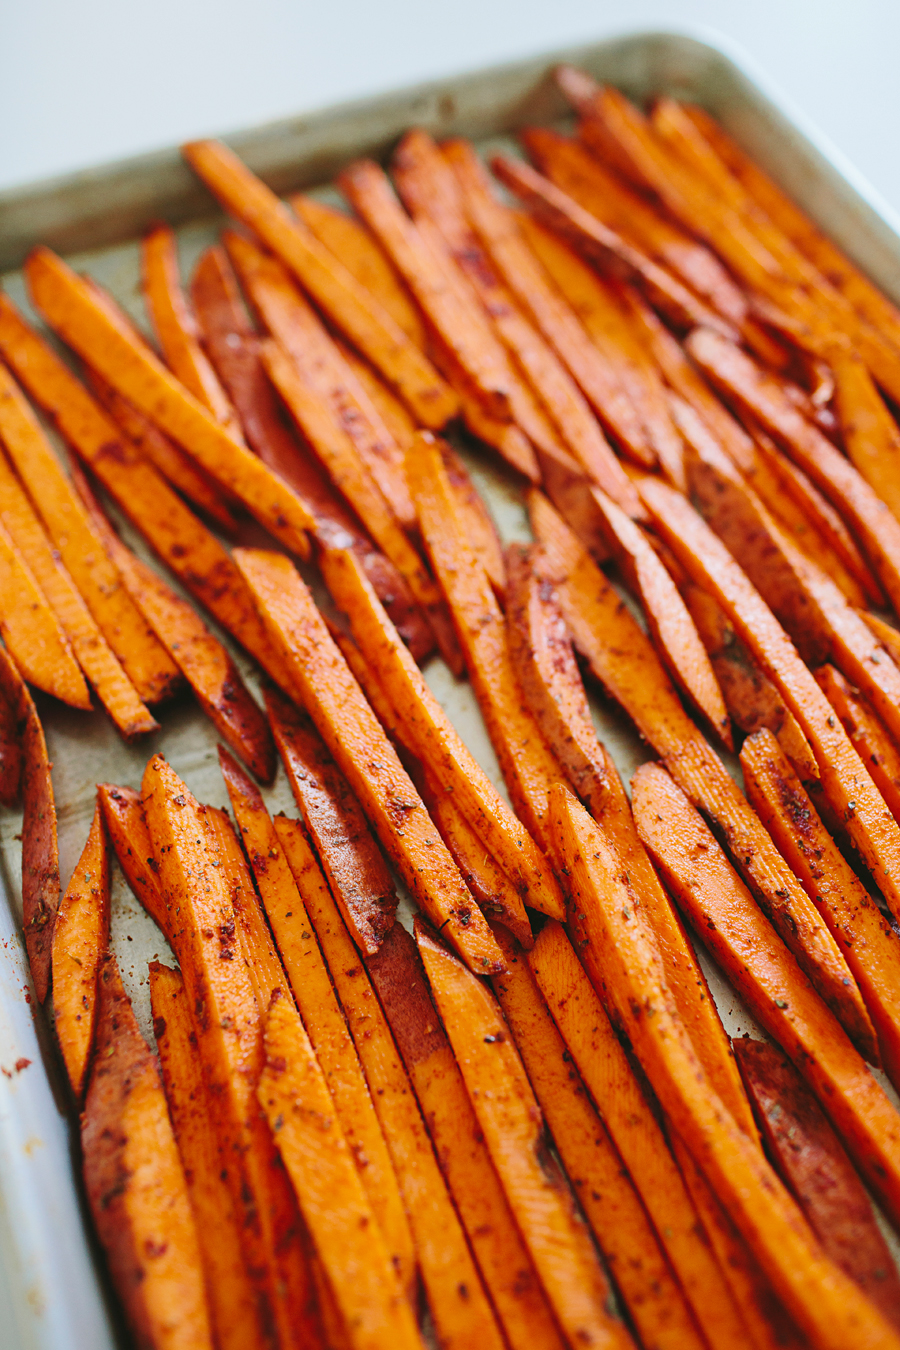
Dump the fries out onto a baking sheet and arrange them into a flat layer. The less they overlap the crispier they will get! As you can see, I was really excited about the fries for lunch the other day, and packed my pan pretty full.

Place into a 425° oven for 20-30 minutes. If you have a convection oven, use it! That will help them cook faster and get a little crispier, too!

While your fries are cooking, start mixing your sauce.

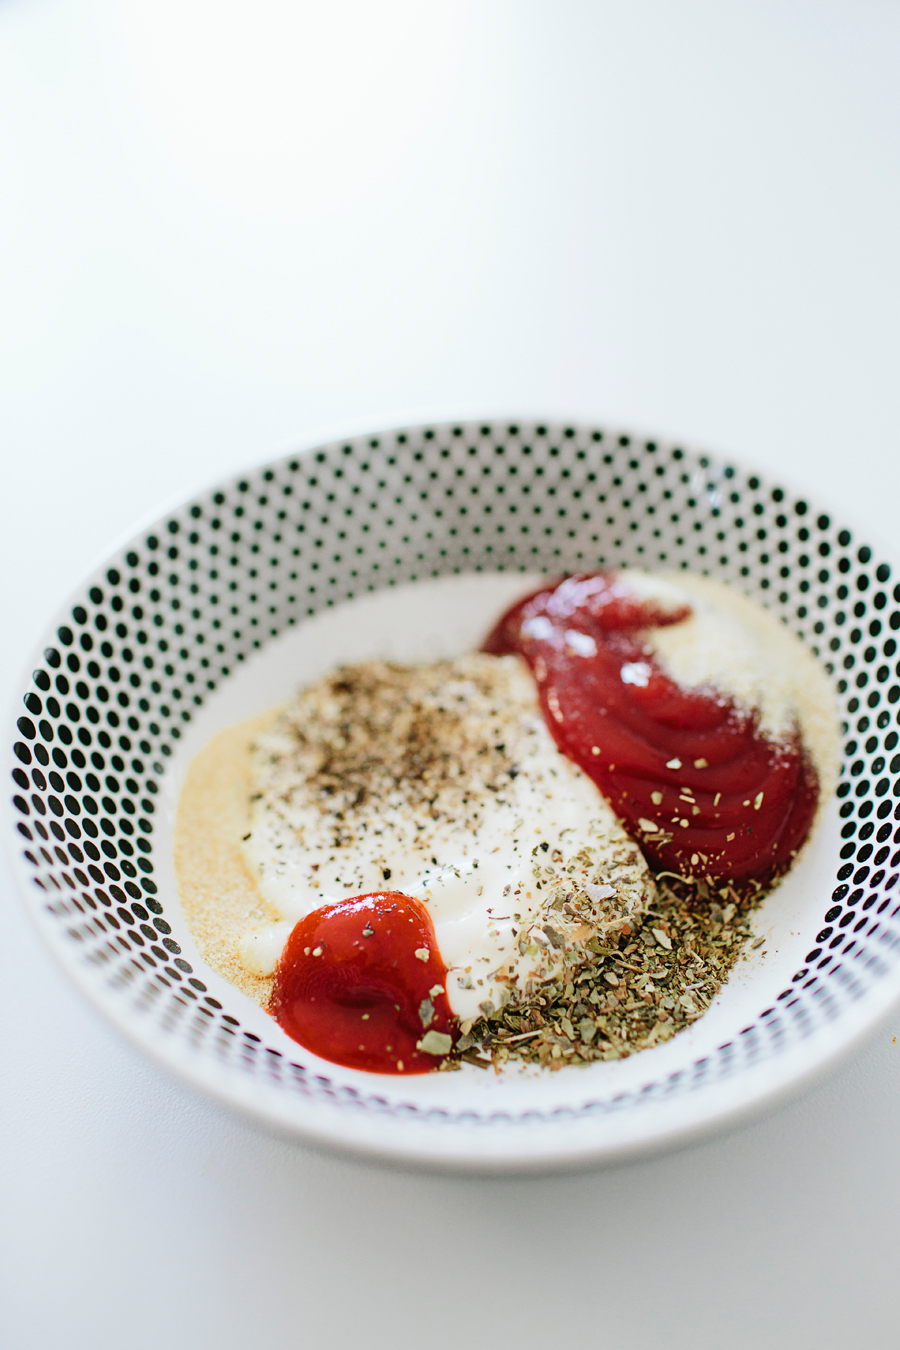
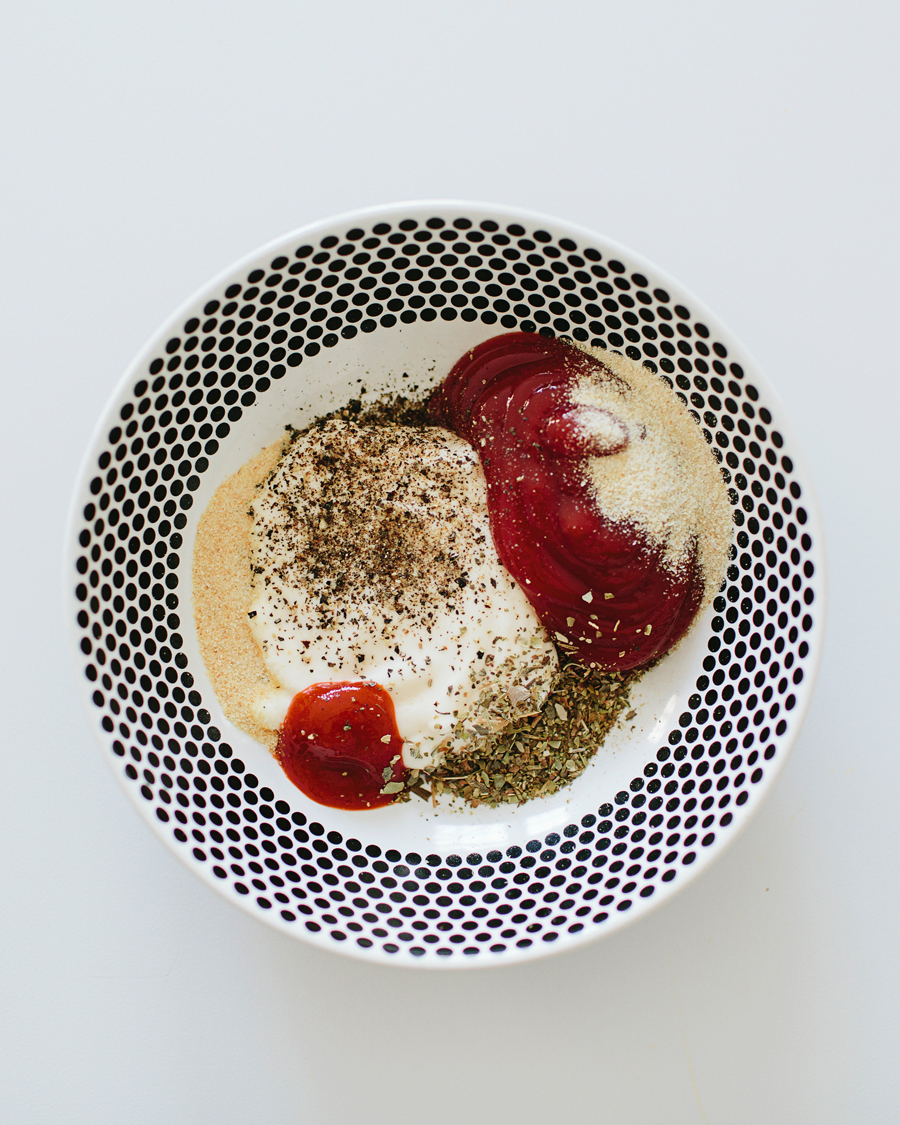
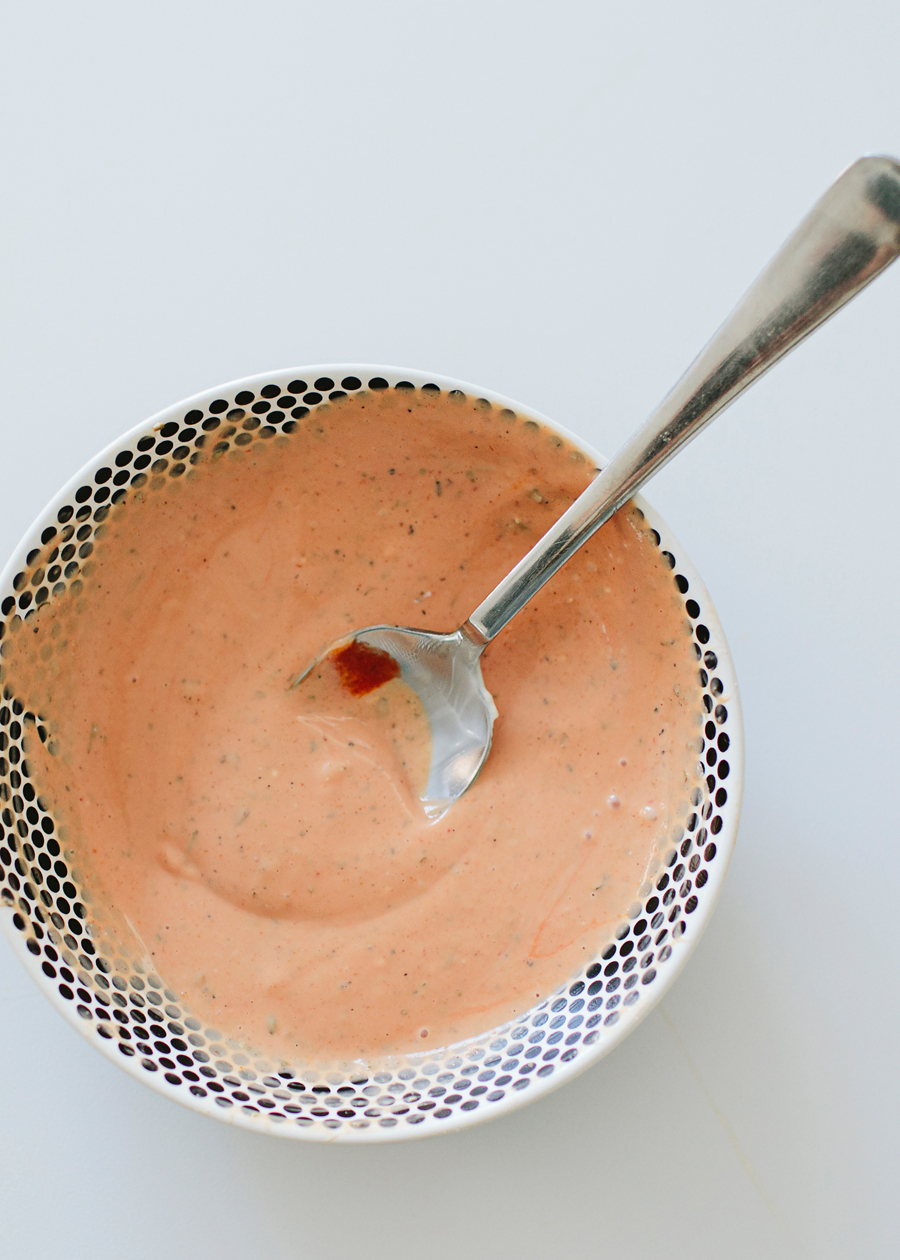
Combine equal parts mayonnaise and ketchup. Add a much smaller amount of Sriracha sauce. (The sauce can get spicy fast! So keep in mind that you can always add more if you feel it needs more heat, but you can never take it away! Start small.) Add garlic powder, onion powder, black pepper, and dried oregano. Mix until well combined!

I never make my fry sauce exactly the same every time. Sometimes it has way more heat than others, sometimes it's more peppery, or sometimes it's sweeter with ketchup, but it is without a doubt delicious every time. Don't over think it! Give it a shot and change what you want to next time. Cooking for yourself, or your family, should be fun, not science. 👍🏼

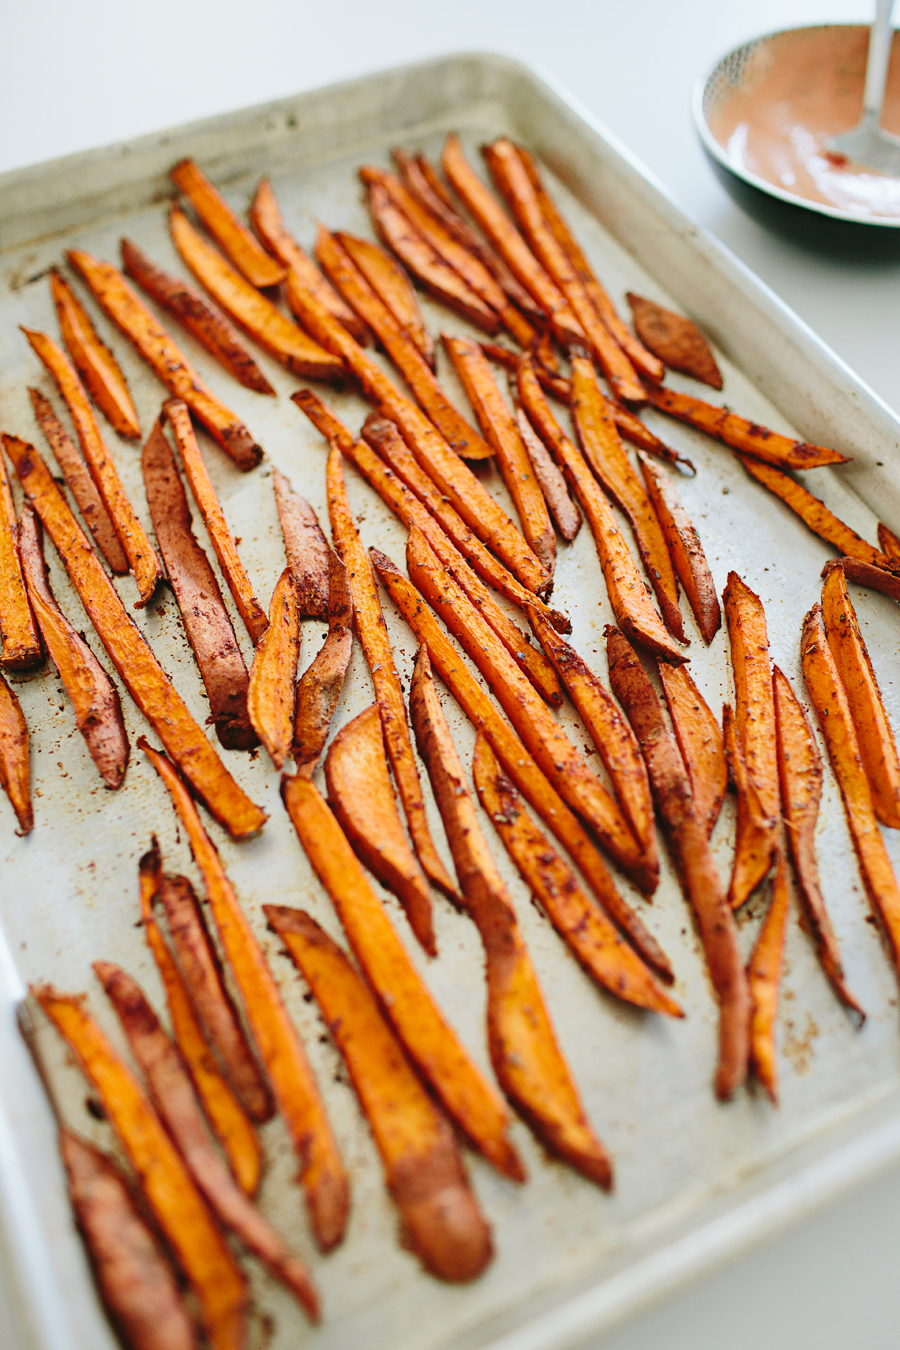
Before I remove the entire tray of fries from the oven, I always poke one of the larger ones with a fork and test it out, just to make sure they're cooked all the way through. Once cooked, remove them from the oven, and if you can wait, give them a few minutes to cool on the tray before you start eating them! Also, resist the urge to dump the entire tray onto a large plate, causing them to pile one on top of another. This will make the fries get soggy really fast, from the heat and steam they release. Serve them directly onto your plate, and enjoy!

If you make these fries, be sure to tag me in a photo of them on Instagram (@brookecourtney) or send me a Snapchat (@brookemousetis) - I'd love to see 'em!

Snack Tray / Hawaiian

 photo brookecourtney_snacktrayhawaiian-1.jpg

I pretty much love all things "Hawaiian" flavored. Pizzas. Sandwiches. And now, snack trays. Looking at this photo now I wish I had put some macadamia nuts on there. Gah! That would have made the whole thing perfect!

 photo brookecourtney_snacktrayhawaiian-2.jpg photo brookecourtney_snacktrayhawaiian-3.jpg

SNACK TRAY / HAWAIIAN:

  • Honey Ham
  • Swiss Cheese
  • BBQ Chips
  • Pretzel Sticks
  • Pineapple
  • Dipping Mustard
  • Macadamia Nuts (not pictured above, but would be a delicious addition!!)
 photo brookecourtney_snacktrayhawaiian-4.jpg photo brookecourtney_snacktrayhawaiian-5.jpg

Wooden Serving Board: Target / Black + White Dish: Ikea (Old) / Gold Bowl: Target

Snack Tray / The Original

 photo brookecourtney_snacktray101-1.jpg

The fact that I am even writing a post about this CRACKS. ME. UP. I have been laughing about it for days. It makes me happy, deep in my heart.

Snack trays were invited by my Mom in the late '90s.  😂 Unlike today's modern snack tray, they were created out of necessity -- out of "we have nothing but random fruits and crackers and ingredients in our pantry" so, let's slap them all on a cutting board and call it dinner. And we LOVED it. Quickly, snack trays became the thing to enjoy while watching the VHS movies we'd rent from Blockbuster. And eventually, without really thinking too much of it, they became a staple in The Courtney Home.

For whatever reason, I kinda forgot about them... until sometime last year when I had no idea what to make T.J. and myself for dinner. ENTER: snack tray. I threw a few pretzels, cheese, apples, almonds and other items on a tray and it was delicious. T.J. immediately said "WHY have you never made this before? WHY don't we eat this all the time?!?!" And since then, we've never looked back.  😂

 photo brookecourtney_snacktray101-3.jpg

I'm not joking. We'll go weeks at a time where we'll eat two a day. Not always with the same ingredients each time, but they certainly "hit the spot" every time. My favorite thing about them is that they're fast and pretty. And simple. Because I really love to cook... so, for me, it rarely stems out of "I just can't even make dinner right now." It's more, just, that they're awesome.

 photo brookecourtney_snacktray101-7.jpg photo brookecourtney_snacktray101-5.jpg

SNACK TRAY / ORIGINAL:

  • Pretzels
  • Cheese (usually sharp cheddar)
  • Apple Slices
  • Nuts
  • Chocolate Chips (frozen!)
  • Grapes (or any additional fruit)
  • Dipping Mustard (Herlockers / We consume JARS and JARS of this stuff.)
 photo brookecourtney_snacktray101-6.jpg photo brookecourtney_snacktray101-8.jpg

I hope you'll try making one - either for dinner or as a snack! Have fun with it. Make it your own. Use what you have. And if you make one send me a photo! You can snap it to me, or T.J. / brookemousetis or tjmousetis / or tag me on Instagram / @brookecourtney #snacktrayz

T.J. and I have been dying over the photos you guys are sending so far. Yesterday we got one that was made for someone's kids and it had chopped up granola bars on it which was INCREDIBLE. That's the #snacktrayz spirit! 

Enjoy!

 photo brookecourtney_snacktray101-2.jpg

Dishtowel: Target / Wooden Serving Board: Target / Gold Bowls: Target / White Bowls: Vintage

Sea Salt Brownie Cookies

 photo brookecourtney_seasaltbrowniecookies-10.jpg

Brace yourselves. These cookies are about to become a new staple in your life. Like, every-single-day-life. They're called brownie cookies and that's definitely accurate. The dough is very thick and sticky and the first time you make them you'll be thinking to yourself "this can't possibly be right," but I assure you, it is!

I took a batch of these cookies to my nephew's 1st birthday party recently, where one guest pulled me aside and with wide eyes exclaimed "I don't know what heaven taste's like. BUT I'm pretty sure IT'S THIS" as she chomped through her second cookie. 😂

 photo brookecourtney_seasaltbrowniecookies-2.jpg photo IMG_4542.jpeg

The ingredients are quite simple and I'd bet you have most of them in your pantry already. I personally eat A LOT of olive oil - I use it on and for everything - so the fact that this recipe doesn't have any butter, but has olive oil instead, makes me so happy. Top it all off with sea salt and I'M IN.

 photo brookecourtney_seasaltbrowniecookies-12.jpg

SEA SALT BROWNIE COOKIES

  • 1/2 c. olive oil
  • 1 c. sugar
  • 2 eggs (preferably free range!)
  • 3/4 c. flour
  • 3/4 c. cocoa powder (natural)
  • sprinkle of sea salt (+ more for tops of cookies)
  • 1 tsp. baking soda
  • 1 tbsp. hot water
  • 1 tsp. vanilla
  • 1 1/2 c. chocolate chips (semi-sweet)
 photo brookecourtney_seasaltbrowniecookies-4.jpg

DIRECTIONS:

In a large mixing bowl with hand mixer, or your stand mixer, combine olive oil and sugar. Beat in eggs one at a time. Add flour, cocoa and salt - combine well. At this point your dough should look like a dark brownie mix, just super thick! In a separate dish, dissolve the teaspoon of baking soda into the tablespoon of hot water. Then add the "baking soda water" and vanilla to the mixing bowl and combine well. Finally, fold in your chocolate chips!

Refrigerate dough for a least 1 hour - or overnight. You need it to really "set up", so you can scoop it onto your cookie sheet with a cookie scoop.

 photo brookecourtney_seasaltbrowniecookies-5.jpg

Once dough has chilled an hour or more, preheat your oven to 350. Remove dough from the fridge and scoop onto your cookie sheet with a cookie scoop. My cookie scoop is rather small, (about the size of a golf ball, or a bit smaller) which worked perfectly for these. I also prefer to bake all of  my cookies on parchment paper, but it's not necessary if you don't have any. The dough will be very sticky. I had to run my scoop under hot water a time or two, between baking the batches, to help everything scoop more easily. Sprinkle the tops with sea salt before placing in the oven.

 photo brookecourtney_seasaltbrowniecookies-6.jpg

Bake at 350 for 10 minutes. Remove from oven and let cool completely on the cookie sheet. Transfer to a plate, or directly to your mouth, only once cooled! They'll be beautifully gooey inside, like a brownie, but a bit crisp on the outside like a cookie. It's the best of both worlds.

The next time I make these I plan to add walnuts. Or macadamia nuts. Mmm.. let me rephrase that - tomorrow when I make these, I plan to add nuts. Enjoy!

 photo brookecourtney_seasaltbrowniecookies-8.jpg photo brookecourtney_seasaltbrowniecookies-9.jpg photo brookecourtney_seasaltbrowniecookies-11.jpg